How to Approach Cosmetic Teeth Whitening the Right Way
Cosmetic teeth whitening is one of the most accessible improvements in dental aesthetics — but patients who approach it without a clear process often end up with results that fall short of expectations, sensitivity they weren’t prepared for, or disappointment after investing in the wrong product for their specific type of staining.
Here’s how to do it correctly, from beginning to end.
Step 1: Understand What’s Causing the Discolouration
Before any whitening product is applied, the most important step is identifying the type of staining present. This isn’t something that can be done reliably by looking in a mirror — it requires a brief professional assessment.
Surface staining from dietary habits responds well to whitening. Internal staining from certain medications, fluorosis, or past trauma responds partially or not at all. Teeth that look yellow primarily because enamel has thinned over time — revealing the naturally darker dentine underneath — have a limited ceiling for improvement from bleaching alone.
Skipping this step and buying a product based on marketing claims is the most common reason patients end up dissatisfied with whitening results. Starting with a professional assessment ensures the approach matches the actual problem.
Step 2: Confirm the Teeth and Gums Are Healthy
Whitening treatment is most effective and most comfortable when it begins with healthy teeth and gums. Existing decay can cause significant sensitivity or pain when bleaching agents contact unprotected dentine. Active gum disease creates soft tissue vulnerability that makes whitening uncomfortable and potentially counterproductive.
A professional check before whitening begins confirms the mouth is in good condition for treatment — and identifies anything that needs addressing first. This protects both the comfort of the whitening experience and its results.
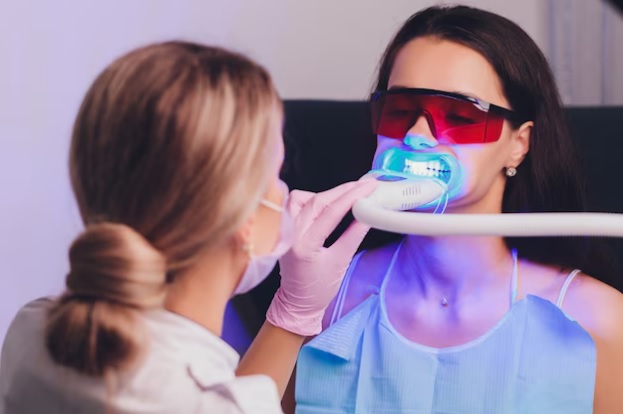
Step 3: Choose the Right Method for Your Situation and Goals
Professional whitening is available in two main formats: in-office treatment for immediate results in a single appointment, and custom take-home trays for gradual, controlled improvement over two to four weeks.
In-office treatment suits patients who want a significant visible change quickly — before a wedding, a job interview, or another occasion with a defined date. Take-home trays are better suited to patients who want more control over the degree of change and are comfortable with a gradual process.
A combined approach — an in-office session for an initial jump, followed by take-home trays for maintenance — is often the most practical option for patients who want significant results with ongoing maintenance built in from the start.
Step 4: Manage Sensitivity Before It Becomes a Problem
Tooth sensitivity is the most common side effect of whitening — and it’s much easier to manage proactively than reactively. Using a sensitivity toothpaste for two weeks before beginning treatment builds up potassium nitrate in the dentinal tubules, reducing the sensitivity response.
Professional whitening includes desensitising steps that self-administered products don’t provide. If sensitivity has been a problem with previous whitening attempts, discussing this with a dentist before treatment allows for a modified protocol that delivers results with significantly less discomfort.
Step 5: Follow the Post-Treatment Window Carefully
The forty-eight hours immediately after whitening are the most important for preserving results. Enamel is temporarily more porous following bleaching treatment, making it more susceptible to restaining. Avoiding coffee, tea, red wine, dark berries, tomato-based sauces, and tobacco during this window protects the results achieved during treatment.
Beyond the immediate post-treatment period, moderating the dietary habits that cause the most staining — or rinsing consistently with water after consuming them — extends the life of results significantly.
Step 6: Plan for Maintenance
Whitening results are not permanent. They fade at a rate determined by individual dietary habits, oral hygiene consistency, and the natural aging of tooth enamel. Planning for maintenance from the beginning — rather than treating whitening as a one-time event — produces the best long-term results.
Custom take-home trays used periodically with maintenance gel keep results stable with minimal time and cost investment. Most patients find that a few nights of maintenance use every six to twelve months is sufficient to keep their smile at the level they achieved during initial treatment.
For Colorado Springs patients ready to begin this process with professional guidance, cosmetic teeth whitening in Colorado Springs at Robison Dental includes every step described here — from the initial assessment through to personalised maintenance planning.
FAQs
Q: How white will my teeth actually get?
The result varies by individual — enamel thickness, starting colour, and staining type all affect the ceiling of achievable improvement. Most patients achieve a natural-looking improvement of several shades. A professional assessment provides a realistic expectation for each specific case.
Q: Can whitening fix grey or brownish teeth?
Grey discolouration — often from tetracycline antibiotic exposure or trauma — is among the most difficult types to treat with bleaching. Some improvement may occur, but the results are less predictable than for yellow staining. Alternative cosmetic options such as veneers typically produce better outcomes for significant grey discolouration.
Q: Is there a difference between whitening and brightening products?
“Brightening” is a marketing term rather than a clinical one. Products described as brightening typically use mild abrasives or optical agents that affect surface appearance without the bleaching mechanism of hydrogen peroxide. They produce more limited results than genuine whitening treatment.