Scuba Diving Knots Explained: Essential Knots Every Diver Should Know for Safety
Knots don’t come up on your first dive, or your second. But somewhere around the time you start progressing toward Divemaster level, or the first time you watch an instructor secure a buoy line in a current with complete unhurried confidence, you realise that knowing your knots is part of what separates someone who can dive from someone who can really handle themselves underwater.
Scuba diving knots aren’t about showing off. They’re about being competent in situations where competence actually matters: securing gear, setting up lines, managing emergencies, and working with equipment that needs to hold under tension and release cleanly when you need it to.
Here are the essential ones, explained the way a diver actually needs to understand them.
The Bowline
The Bowline forms a fixed loop that won’t tighten under load and won’t slip. It’s one of the most trusted knots in sailing and diving for exactly this reason. Use it when you need a reliable loop for divers to hold onto during a descent in current, for attaching a lift bag to a line, or for securing a boat to a mooring.
To tie it, make a small loop in the standing line, pass the working end up through it, around the back of the standing part, and back down through the loop. Pull tight. The old mnemonic is “the rabbit comes up through the hole, around the tree, and back down the hole.” It works.
The Reef Knot
The reef knot is probably the most well-known knot in the world, and also one of the most misused. It’s strong when used as a binding knot, meaning it holds something in place with pressure from both sides. It’s unreliable when used as a joining knot under uneven tension, which is a common mistake.
Use the reef knot to secure dive flags, bind objects together for transport, or do temporary equipment repairs. Don’t use it to join two lines that will be placed under load in different directions. That’s where it fails. People who find themselves confused by a simple knot in diving or cave scenarios often discover that the reef knot slipped under conditions it wasn’t designed for.
To tie it: right over left and under, then left over right and under. Both loops should lie flat and parallel. If they cross or sit at an angle, you’ve tied a granny knot, which is weaker and less reliable.
The Sheet Bend
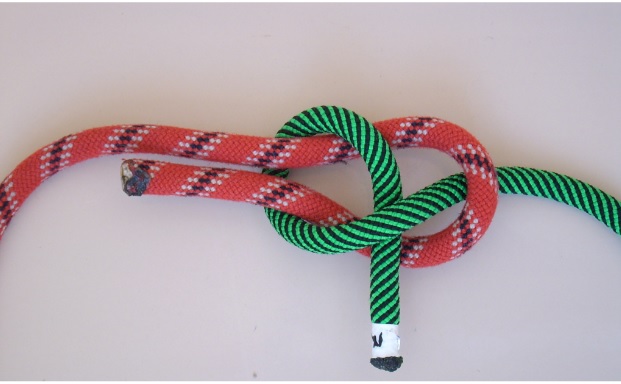
When you need to join two lines of different thicknesses, the Sheet Bend is the right choice. Unlike the reef knot, it handles differences in rope diameter well and holds under tension without slipping.
Form a bight (a U-shaped curve) in the thicker line. Pass the thinner line up through that bight, around both parts of the thicker line, and tuck it under itself. For added security, especially in currents, use a Double Sheet Bend by making an extra wrap before tucking under. The Double Sheet Bend is the version you want when the connection matters.
The Clove Hitch
The Clove Hitch attaches a line quickly to a post, buoy, or cylindrical object. It’s easy to adjust, which is exactly why it’s useful. When you need to reposition a surface marker buoy or anchor a line temporarily, the Clove Hitch lets you move fast.
The important thing to understand: the Clove Hitch holds well under consistent tension but can slip if tension is released and reapplied from different angles. For temporary, adjustable attachments, it’s excellent. For critical loads where the rope needs to hold regardless of angle, use something more secure.
The Double Fisherman’s Knot
For permanent or semi-permanent joins between two ropes, particularly when creating loops in lines or joining sections of a reel, the Double Fisherman’s Knot is the standard. It’s tight, it doesn’t come undone easily, and that’s the point.
Place two rope ends parallel and overlapping. With one end, tie a double overhand knot around the other rope and pull snug. Repeat on the other side. Pull both standing ends apart until the two knots seat firmly against each other. This knot is not quick to untie, which means use it when permanence is what you need.
Quick-Release Knots
Some scenarios need a knot that holds under tension and releases instantly on demand. The slip knot is the foundational example. It works by forming a loop with a free end that can be pulled to release the whole knot immediately.
In rescue situations, in heavy surge, or any time you need to free a line fast, a quick-release knot can be the difference between a smooth resolution and a panic situation. Practice these until you can tie them by feel.
On Entanglements
It’s worth addressing: the most common knot-related problem divers face isn’t tying a knot incorrectly, it’s getting tangled in a line and making it worse. If you find yourself entangled, stop moving immediately. Pulling and twisting tightens things. Follow the line to the snag point, work slowly, and reverse whatever created the tangle.
Stay calm, and your air consumption stays manageable. Panic and you’ll burn through your tank before the problem is solved.
Getting to the Point Where Knots Matter
If you’re at the stage where scuba diving knots feel relevant, you’re probably thinking about moving toward Divemaster or beyond. La Bombona’s Divemaster programme in Koh Tao covers rope work, line management, and the full range of professional diving skills in a structured way.
Details on the Divemaster course are at lbdivingkohtao.com/dive-master.